skip to main |
skip to sidebar
 As I was perusing the internet today, looking for something interesting to blog about, I stumbled across this blog dedicated to package design. The site includes not only studies of existing package designs and marketing strategies, but also conceptual redesigns of existing products. Since we just got our grades back for Project 5, I thought that I'd share the link for a little inspiration for revisions...
Here's the link:
http://www.thedieline.com/
 Upon checking out Smashing Magazine's blog yesterday, I came across an article called "50 Beautiful Free Icons Sets for Your Next Design." Since I had just posted about icons last week in my blog and created some related ones for Project 6, I found the article to be chock full of great free resources and thought I'd share the link with everyone. The article also has some great free vector artwork as well. I highly recommend checking it out. Here's the link:
http://www.smashingmagazine.com/2009/12/14/50-beautiful-free-icon-sets-for-your-next-design/
I came across this process while searching through the database at eHow.com. It's a three-step process for fastening a seat belt in a car. I feel that any child over the age of 5 who has ever ridden in a vehicle has had their seat belt buckled for them by their parents and have then learned by example. The written out instructions seem pointless to me. Buckling my seat belt is second nature to me and goes hand-in-hand with starting the engine, but I digress...
Here are the steps:
Step 1 - Sit in the seat of your car and adjust it so that you are comfortable. Usually the adjustments for car seats are underneath the front or on the side. Raise, lower or slide the seat to your desired position.
Step 2 - Pull the seat belt out from its holder. Seat belts are on a track, which automatically tightens part of the strap against your body. Pull the seat belt out far enough so that it can reach across your waist toward the receiving end of the belt.
Step 3 - Push the male end of the seat belt into the female end until you here a "click." At which point you can release the seat belt. The excess slack should automatically tighten back into the seat belt holder.
Monday, DC Comics announced that they will be launching a new line of graphic novels featuring their major characters that will set aside the continuity-heavy stories that occupy the DC Universe proper and open up the characters to be accessible to a new audience. The line, being called "Earth One," will open with Superman and Batman and will contain a continuity established across the line.
I find this particularly interesting because it mirrors a line of comics that Marvel had major success with at the beginning of the decade in their Ultimate Marvel titles. Now, DC has attempted to create a similar line in the past with their "All-Star" titles, but in my opinion, they never lived up to the hype. This time around, they seem to be keeping it simple, keeping the characters true to their roots (while modernizing the stories for a new audience) and continuing to use top-notch talent.
Only time will tell if these books can help bring new readers into comic shops as the "Ultimate" line did in the early-2000s, but after seeing the preliminary art (which I've added below), I'm willing to give it a shot.
 A pin-up by for Superman: Earth One,
by written by J. Michael Straczynski
and drawn by artist Shane Davis.
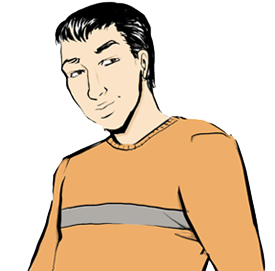
 Concept artwork for Batman: Earth One written
by Geoff Johns and drawn by Gary Frank
featuring Bruce Wayne/Batman.
 Concept art for Alfred, by Gary Frank.
Recently, during one of our meetings at work, a guest presenter came in to demonstrate proper technique for using Russian kettlebells. One of the exercise that he demonstrated was called the Turkish Get-up. It is an advanced kettlebell exercise that works nearly ever muscle in the body in one series of movement. It is extremely difficult to master, but below are the steps in how to perform it (along with a series of images for each step).
Step 1 - Get into position. The starting position has you lying on your back with your left knee propped up and your right leg flat on the ground. Raise your left hand to the ceiling. If you want to begin the Turkish get-up with some resistance, hold some weight, such as a kettlebell, in your raised hand.
Step 2 - Prop up to your elbow. The first movement in the exercise is propping up to your right elbow (or to whichever elbow is not extended upward). Do so by keeping your raised hand completely straight. Roll from the shoulder up and slightly to the side to prop up. Make sure to keep yourself looking at your raised hand (or the weight you're holding) at all times.
Step 3 - Form a base. Once you are propped up on your elbow, you need to form a base. Do so by pushing your hips up, moving from balancing on your elbow to your hand and fully extending your leg on the same side. Make sure as you do this that your raised hand stays raised and that you continue to look at your hand or weight.
Step 4 - Move to a kneeling position. From your base position, move the front foot (the one on the opposite side of the raised hand) back and underneath you until you can put your knee on the ground. By this point you should still have your left arm raised to the ceiling, your left foot flat on the ground and your right knee posted on the ground.
Step 5 - Stand up. From the kneeling position simply stand up. Do so by extending your left knee as you raise your right leg to a straight position. Again, keep your raised arm straight as you do this. Once you have finished the exercise, reverse the steps back to a lying position. Then change sides and repeat.

I came across an article in the November 29th issue of the New York Times Magazine about a joke product that generated so much attention—not only among consumers but among the license holders as well—that it has been put into full-scale production. That product is the Star Wars: Tauntaun Sleeping Bag.
Based on the scene in The Empire Strikes Back (you know the one...), this novelty item started out as an April Fool's Day joke on ThinkGeek.com's website. Each year, the online retailer devotes their homepage to non-existent items, complete with catalog descriptions, pictures/video, prices and even a "Buy Now" button. When unsuspecting consumers click to buy, they get a Happy April Fool's Day message from the folks at ThinkGeek.
According to the article, the sleeping bag attracted so much attention—tens of thousands of emails and phone messages, no less—that the folks at LucasFilm, Ltd. contacted ThinkGeek about putting the bag into full, licensed production.
The bag retails from $99 and features a Tauntaun head pillow and in intestine-like pattern on the inside of the bag. Below is a link to the article if anyone is interested in read it.

http://www.nytimes.com/2009/11/29/magazine/29fob-consumed-t.html?_r=1&ref=magazine